FINISHING - Page 85.
January 16, 2005: Today was a day of clean
up work again. I have been using the silicone tape as an anti-chafe agent at places
that I thought would be appropriate. I have had my share of cuts from the sharp ends
of tie-wraps and I have covered up some of them here and there after paying the price in
little cuts and blood stains. I also moved the primer valve wires over to the main
battery cable after putting some silicone tape there. The heater air hoses are now
back in position and secured.
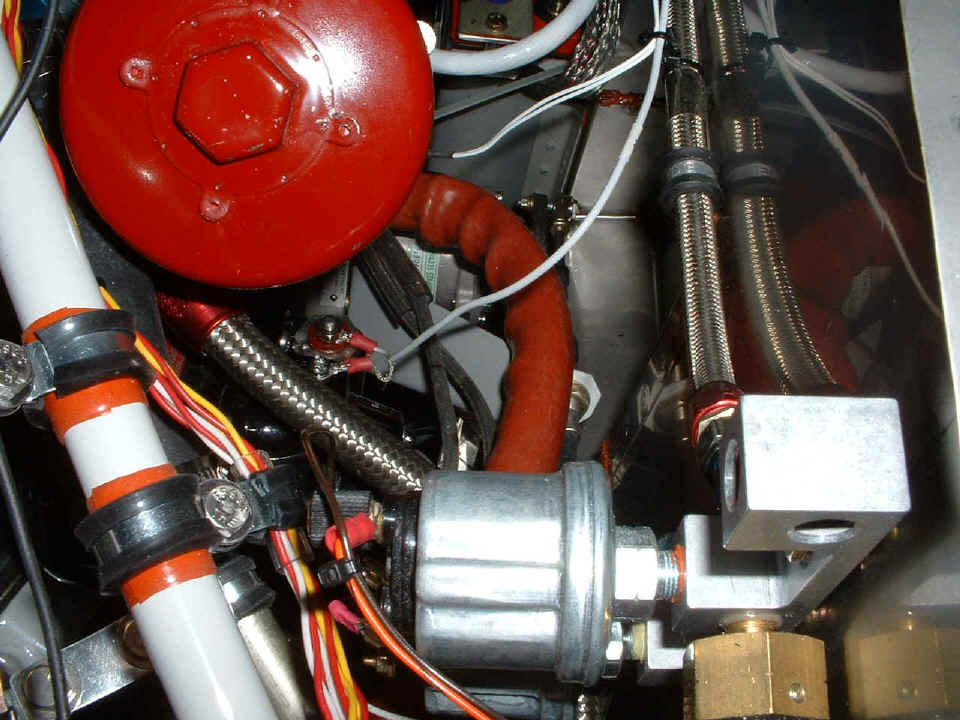
Among the things accomplished today: The P-Lead to the Slick magneto is now
properly connected and ready for service. It doesn't look like much, but that wire
in the center of the photo with the two crimp lugs is the shielded wire that runs all the
way to the starter/mag switch. Running along with the wire are the two white wires
from the oil temperature probe. This completes the connections to the engine to make
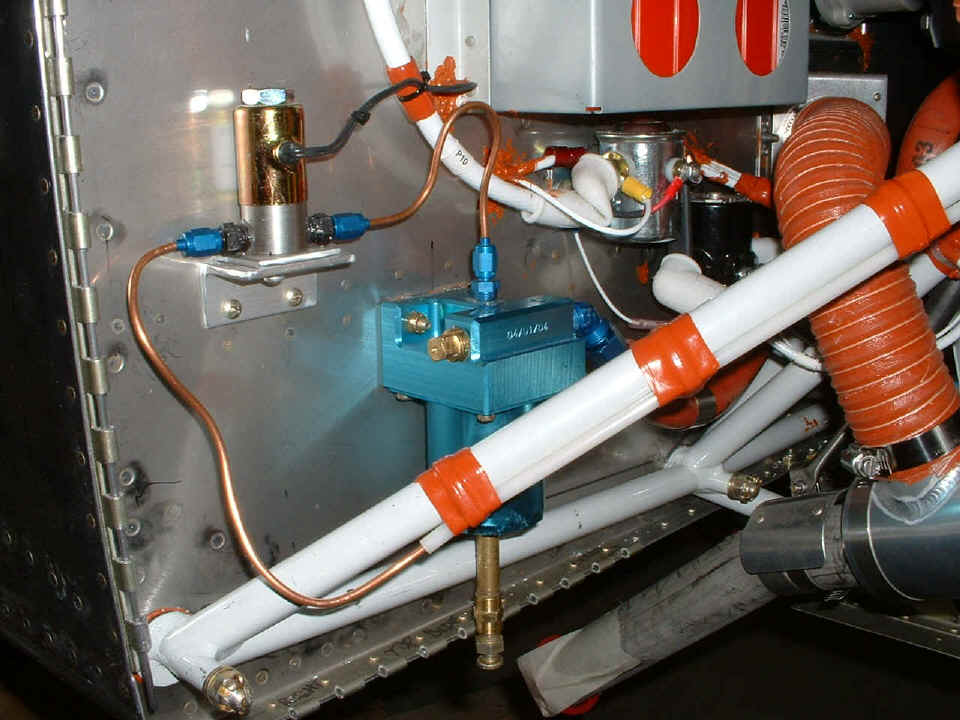
it run and stop. The last thing the engine needs is the filtered air box, and that
will come very soon now. The carburetor and the fuel lines are all connected, right
up to the outside of the fuselage where the wing tanks will be connected at the airport.
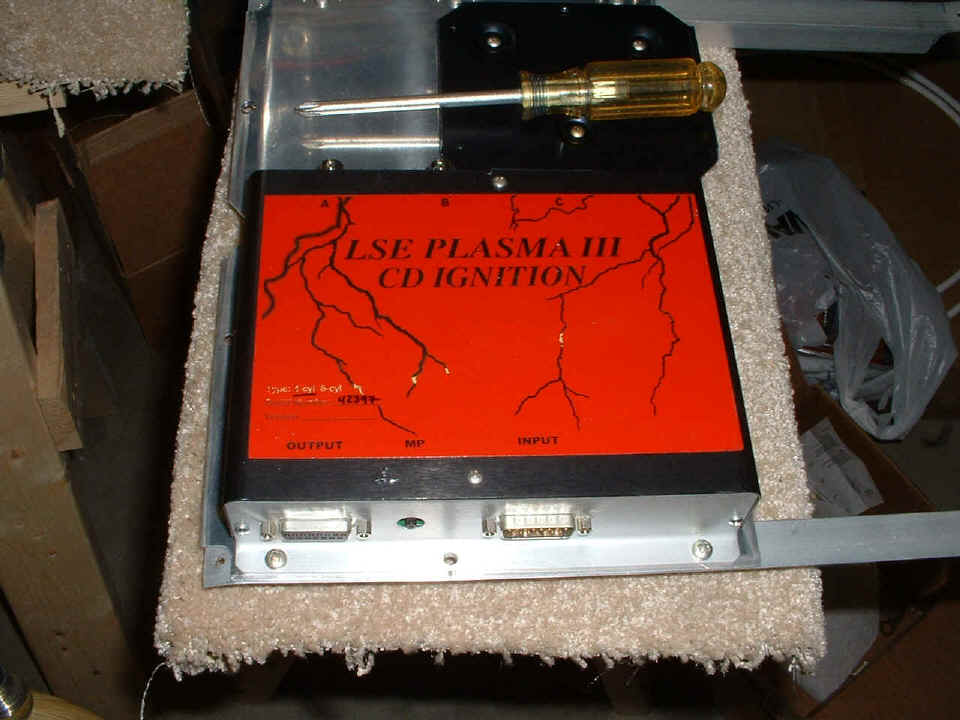
I have been looking at future maintenance issues and discovered one with the
Light Speed Engineering ignition control module. I noticed that one of the mounting
screws was directly in line with the D-sub connector used for P-Lead control from the
starter/MAG switch. Realizing that this module would be very difficult to remove
after the top skin is riveted in place, I had to remove everything to make some changes
now. I took the photo below after I removed the unit from the fuselage. I have
added a new mounting hole to the module mounting flange and a platenut on the angle behind
it. I also removed the platenut at the left screw location right after I took this
photo. Imagine this module installed in the airplane. It is upside down behind
and below the instrument panel on the LEFT side. With the D-sub connector installed
in a tight spot near the LEFT side of the fuselage, the screw at the left is not
accessible. I selected the new screw mounting hole location to be clear of the
manifold pressure line and both D-sub connectors. Removing this module when the
airplane is completed is an upside down, under the panel maneuver. At least now, it
can be done with the removal of only four screws. I got lucky yesterday when I had
the two RG-400 cables connected to this module. The A and B output connectors were
connected to the proper high-voltage modules up on the engine. Before I disconnected
them tonight, I put a tape label on each cable with A and B on them. After I shot
this photo, I used my big black Sharpie marking pen making much larger A and B letters
adjacent to the little letters on the RED label. Since my unit is made for a
4-cylinder engine, there is no output connector or circuitry at port C used in 6-cylinder
models.
While I had this assembly out of the airplane, it was easy to seal up the propeller control cable port through the firewall with the RED high-temp RTV on both sides of the firewall. I also cleaned up some metal filings on the battery when I had it out for a while. Part of those filings were created today when I changed the method of mounting the tachometer sensor mount to the firewall from bolts, washers, and Nylok nuts to use platenuts inside the firewall. Since this is one of the places that I had ground lugs attached, I had to drill a new hole to accept those ground lugs. I cleaned up all the filings on the engine from drilling holes in the rear baffles where I connected the RG-400 cables yesterday.
January 17, 2005: At lunch time today I called Abby Erdmann of Flightline Interiors to order some of her firewall insulation and to discuss seat fabrics and her interior components. She is sending me some fabric samples and a scrap piece of her foam cushion used in her seats. I also ordered some additional items from Aircraft Spruce & Specialty to bond that insulation material to the inside of the firewall. My avionics shipment from Van's Aircraft is in Nashville as I write this, on time for a delivery tomorrow afternoon.
This was a short evening of work, only 2.8 hours. I put batteries into
the ELT and tested it during the first 5 minutes after the top of the hour as prescribed
in the FAR/AIM. The remote control ELT console works as it was intended. I
used the masking tape to secure the Allen wrench on the side of the ELT for later use when
it is time to change the D-cell batteries.

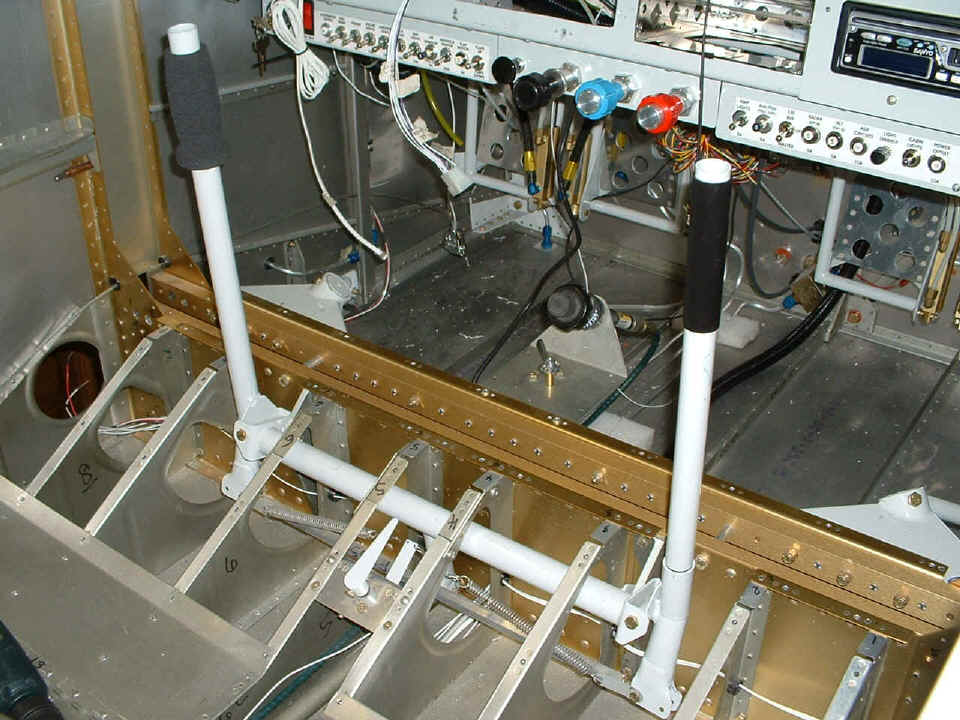
I put in the aileron manual trim control handle and springs. You may
wonder why I have passive manual trim on an airplane with a wing leveler servo installed.
Think "backup systems" and let's move on. Consider this, I have
GPS, VOR, and a "whiskey compass" for navigation.
I took apart the wires to the flap motor and re-routed them to their proper
location for permanent usage. I also secured the red and black motor wires to the
inside of the F785A back rest brace. The other Tefzel wires that are spliced to them
will be secured when I have the last coaxial cable installed in the channel adjacent to
the elevator push rod. That will be at the airport.

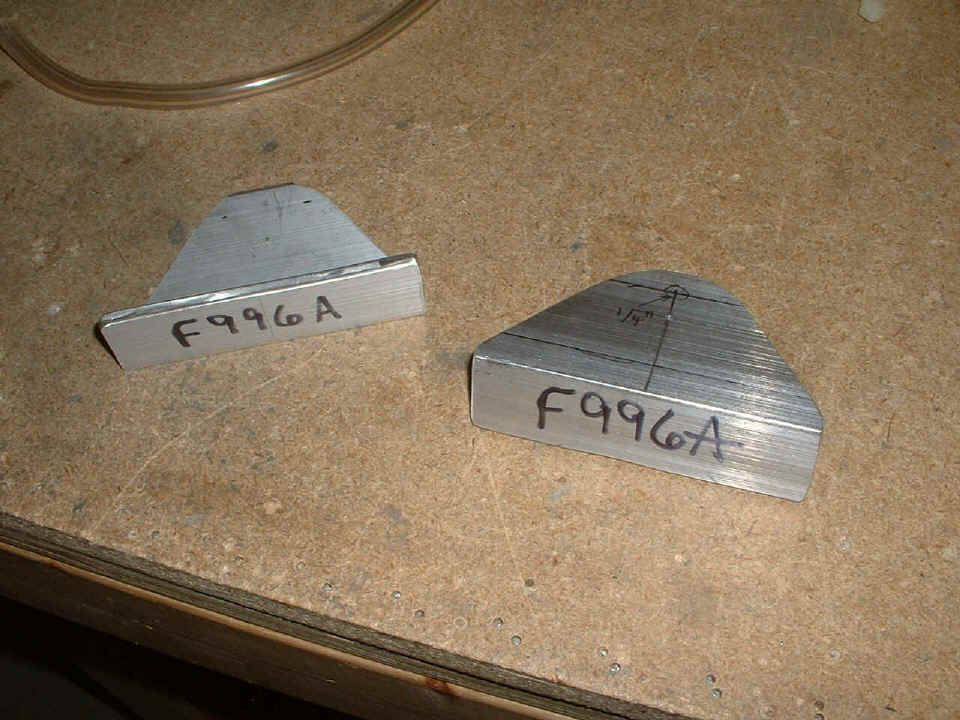
The last thing completed in this evening's session were these F996A wing attach
brackets that bolt to the side of the fuselage and couple to similar tabs on the front
inside rib of the wing tanks. These parts get a custom bend in them, and are
match-drilled in assembly when the wings go on the fuselage, so no bolt holes to be
drilled at this time.
And just a reminder, it is winter, and the temperature outside hardly got above
30 degrees today. The temperature in the garage got up to 64 degrees with some help
from this box fan and the electric oil heater in the kitchen door bringing some heat to
the garage. I put some 3/4" thick insulating foam into the garage door and also
sealed it as best as I could with some wooden blocks wedged into the right places of the
door rails.

Things get better tomorrow when the avionics package is delivered. My aircraft construction time has passed 1550 hours. When I post those pictures, it will be on PAGE 86!
| CLICK HERE for Finishing Page 86. | RETURN to MAIN MENU. |